We don’t want to the leave option to be available until those conditions have been met.
To have a node appear only once , click the node, then under the conditions tab, the pencil and then “display this node only once”.
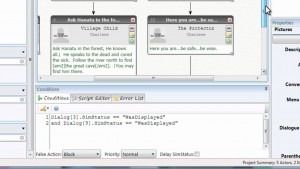
For the last node it’s a little different, because we want to make sure that these two have been clicked before this one appears. Conditions and then Dialogue SimStatus. This basically tells Chat Mapper which of the nodes have to have been selected before this node is revealed.
So I can either type in the ID and in this case the number 3 and then to add another condition I type in “and” Sim Status condition. And another way I can replace this is by highlighting the words and then left click and dragging on top of the words and it gets updated.
Now each one has conditions. Now let us run the the dialogue simulator in order to see how it displays.
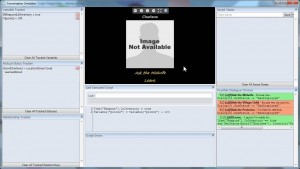
Note how the “leave” node is in orange. That means the node is not yet valid. The conditions of it to be displayed have not been met. Chat Mapper knows that when there is no option to be selected, it will automatically play it. Once I finished speaking to the child, Chat Mapper automatically chose who to speak to. So once the protector was chosen both conditions were met and the last condition was the “leave” option, and since there was no other option on that menu, that was the option that was automatically chosen.
So, once I spoke to the child, I pretty much automatically left. But we want our player to make their own decisions, even if there is only one option.
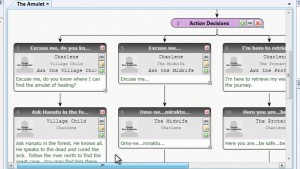
The way I tell Chat Mapper to force a node to be shown is by using the “f” tag which just like the “a” tag, I put it in the menu text. Just make sure you don’t put any spaces, because that will appear in the simulation as well. All decision nodes have the “f” tags. Now we will add emphasis tags and pipes. Emphasis tags are highlighters to make certain words stand out more. Go to project, project settings, and here you’ll find 4 Dialogue Emphasis colors, each one is numbered. I can designate whatever I want, for example, I can have my locations in green, certain names in orange, or specific clues in blue or any other color I want. We will choose Emphasis 2, which is green, for all my locations and my key location. After you have selected the color, going back to your tree window, you will see at the top of the window emp2, colored in green equaling location. This way, in the text where the location is, highlight the name of the location, click the pencil and select em2, which we know it is emphasis 2 and it is a location.
Another thing to do, is add pipes to your conversation text. If the typing area is a bit too small, click on the edge of the text box and drag it towards where your conversation tree is.
Adding pipes, forces a line break in the simulation. This means that if we don’t want a huge big chunk of text showing up we can just add pipes and it breaks down the sentence into smaller sentences that appear one by one, each in a new line, even if the entire paragraph is included in one text box/ node.
In the conversation simulator, we will now have the location, highlighted and the shorter sentences. Also with the “f” tags, the simulator will not automatically play the option.
Once you have finished your dialogue, you can go back and replay it, but it remembered your choices, from the previous play-through. To fix that, in the simulator, click the button next to the left arrow and it will reset everything.
This is the end of the tutorial on the basics of Chat Mapper. In our next tutorials we will show you how to add variables, track relationships like respect and trust and adapting a conversation depending on what the player does.