Chat Mapper is easy to use and intuitive following current standards in Windows application development. In many cases, there are numerous ways to accomplish a task whether it be using the menu, tool bars, right-click context menus, or shortcut keys.
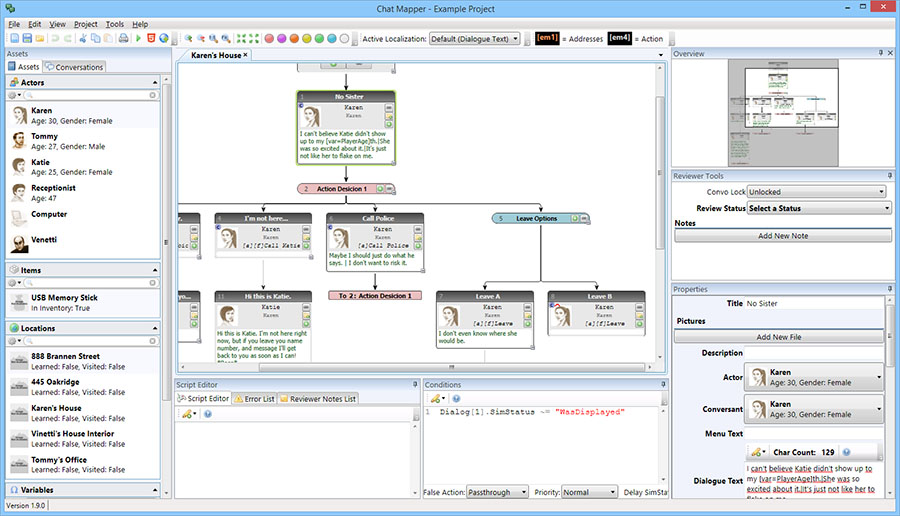
The window layout of the main Chat Mapper application is divided into several window panes as shown in the figure below.
Chat Mapper User Interface
Assets Browser
This is where you will find all of your assets except for conversations. You may sort and filter assets here using any of the asset fields. Each heading can be collapsed for easy navigation.
Conversation Browser
Here you will find all of your conversations. You may also sort and filter conversations.
Main Workspace
A conversation can be opened in the main workspace by double-clicking the conversation from the list. Each conversation is opened in its own tab.
Conditions Editor
Each dialogue node can have conditions associated with them. The conditions are written in Lua and will described in detail later. Clicking a node in the tree will cause the conditions editor to display all conditions currently associated with that node.
Script Editor
Each dialogue node also has a Lua script that will run during simulation. The Lua script associated with the selected node is displayed here.
Properties Editor
All asset fields will appear here for editing. Properties of all assets and dialogue nodes are edited here.
Error List
Summary of all errors in your project. Double-clicking an entry from the list selects the corresponding node in the tree.
Reviewer Notes List
Summary of all reviewer notes in your project. Double-clicking an entry from the list selects the corresponding node in the tree.
Overview
Overview of the entire dialogue tree that provides a quick way to navigate around by clicking or dragging.
Reviewer Tools
Allows locking of the conversation for editing and setting review status of nodes. Also allows for lists of comments to be attached to nodes. This feature is available for license holders only.
File Browser (not shown)
Shows all files on your hard drive and network. These files can be drag-and-dropped onto several locations in the application window.
Video Browser (not shown)
Shows a list of video files and embedded WMV clips in a selected directory. These can be dragged and dropped onto a node's video file attribute and will play during simulation.